In this post, we’ll take you through the basics of setting up a Kubernetes Cluster on Azure Container Service (AKS), the Microsoft cloud service to manage your hosted Kubernetes environment. By the end of it, you’ll have a one node cluster up and running in AKS.
Install Azure CLI
You will need the Azure CLI version 2.0.21 or later installed and configured. Run az --version to find the version. If you need to install or upgrade, see Install Azure CLI.
To manage a Kubernetes cluster, you will need to install kubectl, the Kubernetes command-line client. You can install it by running the following command
[bash]
coderiseio$ az aks install-cli
Downloading client to /usr/local/bin/kubectl from https://storage.googleapis.com/kubernetes-release/release/v1.9.0/bin/darwin/amd64/kubectl
[/bash]
Login to Microsoft Azure account
Sign in to your Microsoft Azure Portal or use Azure CLI command (recommended) i.e.
[bash]
coderiseio$ az login
[/bash]
Create Kubernetes Cluster on Azure
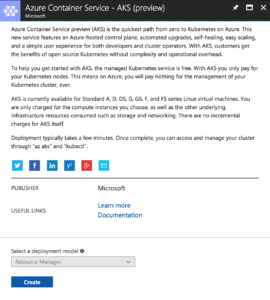
For GUI, navigate to Azure Container Service(AKS) , click Create and follow prompts.
But we will be using Azure CLI going forward 🙂
Create resource group for you cluster:
[bash]
coderiseio$ az group create –name k8sResourceGroup –location eastus
{
“id”: “/subscriptions/bxxxxx-6xxx-4xxx-bxxx-kxxxx/resourceGroups/k8sResourceGroup”,
“location”: “eastus”,
“managedBy”: null,
“name”: “k8sResourceGroup”,
“properties”: {
“provisioningState”: “Succeeded”
},
“tags”: null
}
[/bash]
Next, Create Cluster by running the following command:
[bash]
coderiseio$ az aks create –resource-group k8sResourceGroup –name crK8sCluster –node-count 1 –generate-ssh-keys
{
“agentPoolProfiles”: [
{
“count”: 1,
“dnsPrefix”: null,
“fqdn”: null,
“name”: “nodepool1”,
“osDiskSizeGb”: null,
“osType”: “Linux”,
“ports”: null,
“storageProfile”: “ManagedDisks”,
“vmSize”: “Standard_D1_v2”,
“vnetSubnetId”: null
}
…
“dnsPrefix”: “crK8sClust-k8sResourceGroup-bxxx”,
“fqdn”: “crk8sclust-k8sresourcegroup-bxxx.hcp.eastus.azmk8s.io”,
“id”: “/subscriptions/bxxx-xxx-xxx-xxx/resourcegroups/k8sResourceGroup/providers/Microsoft.ContainerService/managedClusters/crK8sCluster”,
“kubernetesVersion”: “1.7.7”,
“linuxProfile”: {
“adminUsername”: “azureuser”,
“ssh”: {
“publicKeys”: [
{
“keyData”: “ssh-rsa AXXXX…\n”
}
]
}
},
“location”: “eastus”,
“name”: “crK8sCluster”,
“provisioningState”: “Succeeded”,
“resourceGroup”: “k8sResourceGroup”,
“servicePrincipalProfile”: {
“clientId”: “4xxx-xxx-xxx-xxx-xxx1”,
“keyVaultSecretRef”: null,
“secret”: null
},
“tags”: null,
“type”: “Microsoft.ContainerService/ManagedClusters”
}
[/bash]
Connect to the Cluster
Configure kubectl cli to point to your cluster
[bash]
coderiseio$ az aks get-credentials –name crK8sCluster –resource-group k8sResourceGroup
Merged “crK8sCluster” as current context in /Users/coderiseio/.kube/config
[/bash]
Now, you should now be able to verify and view nodes in your cluster
[bash]
coderiseio$ kubectl get nodes
NAME STATUS ROLES AGE VERSION
aks-nodepool1-83619260-0 Ready agent 14m v1.7.7
[/bash]
That’s it! You are all set and ready to use your new Kubernetes cluster in AKS.
in the next post, we will demonstrate how to run applications in your new Kubernetes cluster on Azure.
One Response