Setup SFTP on AWS with Username and Password in 15 minutes
In this blog, we will show you how to setup SFTP on AWS with Username and Password. Earlier this year, AWS added support for enabling password based authentication for AWS Transfer for SFTP using AWS Secrets Manager. AWS Transfer for SFTP is a fully managed service by AWS and helps you migrate your file transfer workflows to AWS. AWS Transfer for SFTP is built on top of S3 and can be a powerful tool if you are looking for a reliable, scalable and durable solution.
Setting up an SFTP server can be a complex task. For this blog, our main focus will be to cover key items that should help you setup SFTP on AWS with Username and Password in less than 15 minutes. If you are interested in the overall design, architecture, or technologies involved, we highly recommend to check out this AWS blog.
Problem Statement
Company ZYX wants to setup an SFTP server for it’s Marketing and Development teams in AWS as shown below:
/content -> Top level S3 bucket.
/content/marketing -> Marketing folder resides within Content. Only Marketing team should have access to it.
/content/development/team1 -> Team1 should have access to just it’s folder and should not have access to any other folders.
/content/development/team2 -> Team2 should have access to just it’s folder and should not have access to any other folders.
Pre-requisite
Create a new bucket in S3 with the name -> ‘content‘
Create corresponding folders within the content bucket:
/content/marketing
/content/development/team1
/content/development/team2
Setup SFTP on AWS with Username and Password
Start the timer 🙂
Step-1: Download the CloudFormation template ( aws-transfer-custom-idp-secrets-manager-apig ) provided by AWS and create the stack. This should create the SFTP server, API Gateway, AWS Lambda functions and required IAM roles.
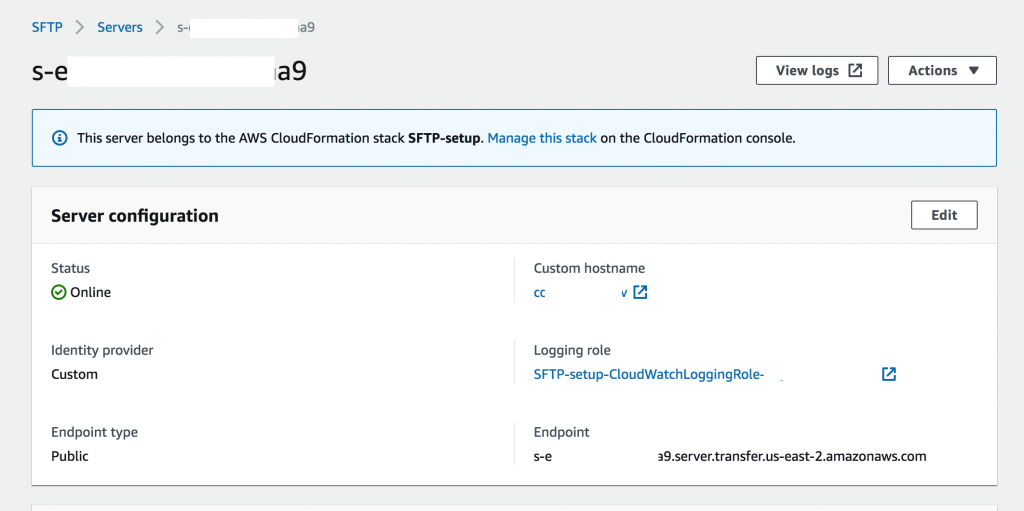
Step-2: Go to AWS Transfer for SFTP section and you will see the server being provisioned. Optionally, you can associate a CNAME DNS entry in Route53 for SFTP server. Stop the timer and wait for provisioning to complete. After provisioning is complete, server will come online. Restart the timer again.
sftp-aws-username-password
Step-3: Go to IAM section and create a new policy named CustomSFTPReadWritePolicy with the following content:
[bash]
{
“Version”: “2012-10-17”,
“Statement”: [
{
“Sid”: “AllowListingOfUserFolder”,
“Action”: [
“s3:ListBucket”,
“s3:GetBucketLocation”
],
“Effect”: “Allow”,
“Resource”: [
“arn:aws:s3:::content”
]
},
{
“Sid”: “HomeDirObjectAccess”,
“Effect”: “Allow”,
“Action”: [
“s3:PutObject”,
“s3:GetObject”,
“s3:DeleteObjectVersion”,
“s3:DeleteObject”,
“s3:GetObjectVersion”
],
“Resource”: “arn:aws:s3:::content/*”
}
]
}
[/bash]
You can also download the file content from github
Step-4: Next click IAM -> Roles -> Create Role and select Transfer. Click Permissions and select the policy created in step-3 i.e. CustomSFTPReadWritePolicy. Follow prompts and create a new role named CustomSFTPTransferRole.
Step-5: Select CustomSFTPTransferRole role created in Step-4 and click ‘Trust Relationships‘ tab. Click Edit trust relationship and enter the following content:
[bash]
{
“Version”: “2012-10-17”,
“Statement”: [
{
“Effect”: “Allow”,
“Principal”: {
“Service”: “transfer.amazonaws.com”
},
“Action”: “sts:AssumeRole”
}
]
}
[/bash]
Note down the ARN for this role as you will need it later to create users. To read more on assume role, please check this link
Step-6: To create users, you will need to create a new Secret. Go to AWS Secrets Manager and click ‘Store a new secret‘. Select ‘Other type of secrets‘ option and create the following key/value pairs (please update values as needed):
Click Next and enter the username as ‘SFTP/marketing’ (prefix SFTP is Important).
Step-7: You can create two more secrets for ‘team1’ and ‘team2’ as you did in Step-6 for ‘Marketing’. The key thing (apart from Password) to change is HomeDirectory. For example, for team1, you will use the following:
Key– HomeDirectory
Value –/content/development/team1
You can always edit any of the secret values by selecting the secret and clicking on ‘Retrieve Secret Value -> Edit‘.
Step-7:Done. Stop and check timer. Hopefully, you were able to get it working and setup SFTP on AWS with username and password within 15 minutes 🙂
Testing
Launch your favourite FTP client and try connecting with SFTP credentials. Here’s a screenshot with Cyberduck on Mac for reference:
SFTP on AWS with Username and Password
If everything went well, you should be able to connect using the SFTP user and have access to user’s home directory.
CLI users can also run this command to trouble-shoot issues:
Hope this will save some precious time and help you setup an SFTP on AWS with Username and Password. If you liked the blog, please comment below and let us know. Also, checkout more DevOps and Cloud blogs on our site here
Hi Taylor, the Cloud Formation template is provided by AWS. How are you trying to import it? I hope you are creating new stack by selecting “With New Resources (standard)” option and then importing the template file directly from your computer. If you can provide some more info, that would be great!
I just downloaded the template and imported into another AWS account. It worked fine for me. Can you check if any other info is logged under Cloud Formation -> Stacks -> Stack Info or Events? Also, are you specifying an IAM role when importing? Make sure it has the required access and permission to create resources.
I used the mentioned steps and able to connect sftp with the credentials, but the user is not jailed on their home directory. Why, its allowed to come out from their home directory. Where I missed on this.
Hi! Thanks for the article. I wondering where on earth did you get this from “sftp:sftp.coderrise.io”. I have checked the sftp server and it is no where to be fine. Awaiting your reply.
Thanks for the tutorial – very helpful. I didn’t do the cloudformation setup as I already have a sftp server. I’m unable to even login using the username I saved for the Secrets. By the way, when saving the secret with SFTP/, it doesn’t mention username anywhere, just name. I tried logging in using and the password I made in the secret but it didn’t work. Is there a workaround where I can manually create a user and add the secret to them somehow?
I had to remove the policy key in secrets to get this to work. Until then, I was getting authentication failture. Seems that adding a key for policy is not needed- just password, role and home directory.

Thanks for these instructions…. I got stuck on the first step in trying to upload the CloudFormation template:
https://share.getcloudapp.com/L1ukO0BQ
Hi Taylor, the Cloud Formation template is provided by AWS. How are you trying to import it? I hope you are creating new stack by selecting “With New Resources (standard)” option and then importing the template file directly from your computer. If you can provide some more info, that would be great!
Yes, that is exactly what I did. Were you able to upload and create a stack using the template?
I just downloaded the template and imported into another AWS account. It worked fine for me. Can you check if any other info is logged under Cloud Formation -> Stacks -> Stack Info or Events? Also, are you specifying an IAM role when importing? Make sure it has the required access and permission to create resources.
I used the mentioned steps and able to connect sftp with the credentials, but the user is not jailed on their home directory. Why, its allowed to come out from their home directory. Where I missed on this.
Hi! Thanks for the article. I wondering where on earth did you get this from “sftp:sftp.coderrise.io”. I have checked the sftp server and it is no where to be fine. Awaiting your reply.
Thanks for the tutorial – very helpful. I didn’t do the cloudformation setup as I already have a sftp server. I’m unable to even login using the username I saved for the Secrets. By the way, when saving the secret with SFTP/, it doesn’t mention username anywhere, just name. I tried logging in using and the password I made in the secret but it didn’t work. Is there a workaround where I can manually create a user and add the secret to them somehow?
Hi Adi, were you able to resolve this; I am having the same issue
Hello all:
I am getting the following error trying to login via command line
sftp myusername@s-xxxxxxxxxxxxx.server.transfer.eu-west-1.amazonaws.com
Also fails using Cyberduck, etc.
Authentications that can continue: publickey,password
Permission denied, please try again
For Secret name I have: SFTP/myusername
Key/Value
Password mypassword
Role myrolename
HomeDirectory /myownS3bucketname/myusername
Created folder called myusername in S3
Policy “copied directly from blog page”
In the policy for the role I replaced “content” with “myownS3bucketname”
All:
The problem was in secrets manager with Key/Value
Make sure when you enter Key or Value you have no white spaces and then save again.
Example:
Role had a trailing space
I had to remove the policy key in secrets to get this to work. Until then, I was getting authentication failture. Seems that adding a key for policy is not needed- just password, role and home directory.