SonarQube is the open source platform to analyze code and continuously inspect code quality of applications. SonarQube also displays health of applications as well as discover any code vulnerabilities. In our previous blog, we discussed the importance of Continuous Integration while working with Kubernetes. In this blog, we will install SonarQube in Kubernetes and analyze a sample application using SonarQube.
SonarQube in Kubernetes Setup
Pre-requisites:
- Linux or Windows machine
- Kubernetes Cluster in running state
- Kubectl client installed
You can install kubectl from this link. If you don’t have a running Kubernetes cluster, you can refer this blog which covers setting up a Kubernetes cluster on Azure or you can also create one manually using minikube.
Step 1 | Clone the Github Repository
We have published all Kubernetes manifests for SonarQube in a repo. You can view the code repository on Github here.
$ git clone https://github.com/coderise-lab/k8s-sonarqube
Step 2 | Make sure your Kubernetes cluster is up and running
$ kubectl get nodes
NAME                     STATUS    ROLES     AGE       VERSION
jakir-hp-probook-4530s   Ready     <none>    18h       v1.8.0
Step 3 | Create secret for Postgres database
This SonarQube installation works with Postgres. But you can change it to other database like MySQL. Postgres is limited for this example only. To secure passwords, we do create secrets in Kubernetes. For postgres, the following secret is created.
$ kubectl create secret generic postgres-pwd --from-literal=password=CodeRise_Pass
Step 4 | Run manifests
$ kubectl create -f sonar-pv-postgres.yaml
$ kubectl create -f sonar-pvc-postgres.yaml
$ kubectl create -f sonar-postgres-deployment.yaml
$ kubectl create -f sonarqube-deployment.yaml
$ kubectl create -f sonarqube-service.yaml
$ kubectl create -f sonar-postgres-service.yaml
This will create pods in the cluster. You can check the pods with,
$ kubectl get po -o wide
NAME                              READY     STATUS    RESTARTS   AGE       IP           NODE
sonar-postgres-6bb954bcf9-zs6wn   1/1       Running   1          17h       172.17.0.3   jakir-hp-probook-4530s
sonarqube-cb5ccb9-ktfzx           1/1       Running   1          17h       172.17.0.2   jakir-hp-probook-4530s
When these two pods are in running state, then it means your SonarQube installation is successful. You can access SonarQube Web UI using Kubernetes services.
Check Sonar service:
$ kubectl get svc
NAME             TYPE        CLUSTER-IP       EXTERNAL-IP   PORT(S)        AGE
kubernetes       ClusterIP   10.96.0.1        <none>        443/TCP        18h
sonar            NodePort    10.102.242.193   <none>        80:31815/TCP   17h
sonar-postgres   ClusterIP   10.102.27.144    <none>        5432/TCP       17h
This cluster is running on localhost. For Sonar service, 31815 port is exposed. So you are able to access the service on http://node-ip:31815/sonar. In our example as the cluster running locally it is http://127.0.0.1:31815/sonar.
The default username and password for the SonarQube is admin.After login to the sonarqube follow the steps by choosing the language of the project like Java or other. Create the project specific key and hash of the project.
Finally you will get this:
sonar-scanner \
  -Dsonar.projectKey=coderisekey \
  -Dsonar.sources=. \
  -Dsonar.host.url=http://127.0.0.1:31815/sonar \
  -Dsonar.login=4bf1806550240eb90246837d008a6a09ec153ba6
Above mentioned is the command to scan the project. For this sonarqube-scanner must be installed on machine on which project will be analyzed.
To download and install sonarqube view this instruction from offical site of the sonarqube.
The sample project repo is inside the repository that you have cloned. The name of the repository is flask.
$ cd flask
$ sonar-scanner \
  -Dsonar.projectKey=coderisekey \
  -Dsonar.sources=. \
  -Dsonar.host.url=http://127.0.0.1:31815/sonar \
  -Dsonar.login=4bf1806550240eb90246837d008a6a09ec153ba6
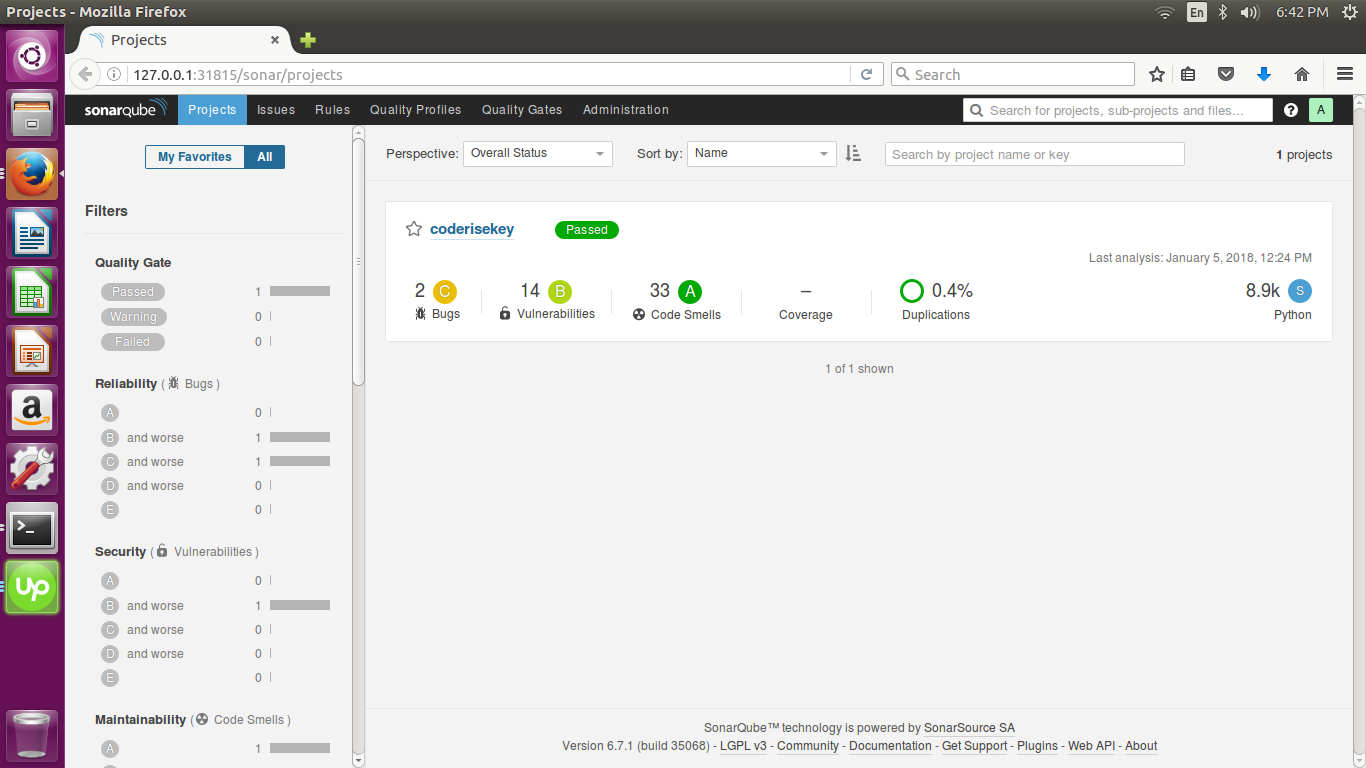
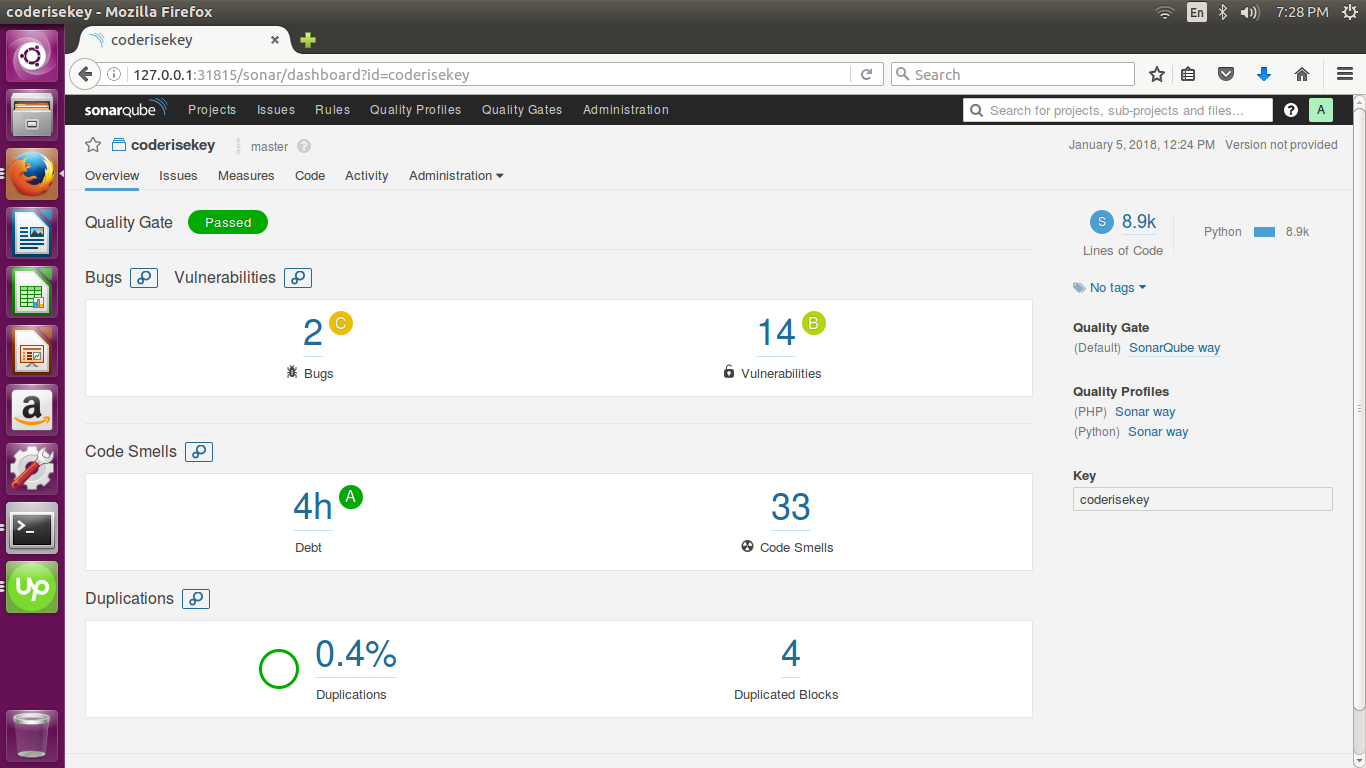
The final output you can see as:
Hey guys,
your tutorial is pretty good and helped us a lot.
Though we had a small issue when launching “kubectl create -f sonar-pvc-postgres.yaml” cause it provisioned another PV automatically – this then had wrong Attributes which the Deployment didnt cooperate with.
So we had to tell the PersistenVolumeClaim to use spec.storageClassName: “standard” avoiding automatic provisioning its own PV.
Keep up your good work. Greetings from Germany
getting problem in deployment
having this problem on deployment: 2019.11.13 20:50:11 INFO es[][o.e.b.BootstrapChecks] explicitly enforcing bootstrap checks
2019.11.13 20:50:11 ERROR es[][o.e.b.Bootstrap] node validation exception
[1] bootstrap checks failed
[1]: max virtual memory areas vm.max_map_count [65530] is too low, increase to at least [262144]